
Overview
This is my best attempt to re-visit how the Apocalypto project came to be. This is my perspective, however, and is sure to fall short of a fair multidisciplinary assessment of the project (let alone the inspiration/collaborations of my teaching partner).
Conception

It all started on a sunny summer day at Luna Grill. My new teaching partner and I were finally sitting down to talk about projects and after brainstorming in circles for a while we had narrowed our focus to one core concept – cycles. My partner, as a humanities teacher, was excited about exploring the cyclic nature of civilization while I was excited to explore the cyclic nature of our physical world (harmonics, gears, waves, etc.). We even started to draw a picture on a napkin of what our exhibition would look like (concentric circles of tables, each addressing a different take on cycles). The initial plan had each student exhibiting their individual work.
Sometime later a teacher from HTMMA (the middle school across the street) emailed me asking for help with a project. He had seen my previous work with gear projects and wanted to pick my brain about the best ways to manufacture them. Around the same time, someone had emailed me an article about the Antikythera Mechanism. One day during our prep period (my partner and I share an office) we started chatting about exhibition dates. He mentioned, jokingly, that we could have our exhibition on the night of the Mayan Apocalypse. I then started talking about these cool emails I’ve been getting about ancient mechanisms and voila – we were going to make a Mayan calendar and exhibit it on the eve of the Mayan apocalypse.
Doing the Project First
At this point it we had no idea if it was possible or how we would do it. With the venerable Jeff Robin on my shoulder I decided to do the project first. While I knew I wouldn’t be able to achieve the scale of the final project, I wanted to create something that could give us hope that it’s possible. We also wanted a hands-on example that we could show our students when describing the project.
It just so happens that our school had recently received a significant donation, part of which was allocated for engineering and fabrication equipment. I was one of a few who pushed hard last June for purchasing a laser cutter and after much deliberation, we were given the OK. A colleague and I researched, purchased, and physically installed the Universal Laser PLS6.150D CO2 Laser Cutter for our organization. I had previously used this great free gear generator program when hand-making gears but I soon purchased the more advanced version for my work with the laser cutter and began to tinker with gears in Adobe Illustrator.
Project Tuning
I went through a project tuning protocol with my peers and colleagues. This process was crucial for the development of the project and my peers helped me to finalize both the project scope and the stages of scaffolding I would need to implement. I underwent a total of three project tuning protocols for this project (not including casual conversations and advice).
- As part of the new teacher development, I attended the Odyssey (a 7 day intensive PBL seminar) and went through a tuning protocol with other new teachers and an experienced faculty member.
- Also as part of new teacher development, I went through a tuning protocol with my peers.
- Lastly, my teaching partner and I went through a tuning protocol with our ‘critical friends’ (another teaching team whom we pair with throughout the year for this type of thing).
The most significant feedback I received was around scaffolding and accessibility for students. We were going to be working with 14 year olds and the project required multiple levels of abstraction, lots of innovation, and the use of lots of new skills. After the tuning phase, the project had been condensed into this project description.
Planning
Scaffolding & Skill Building
Now that we had laid out the requisite skills and approximate schedule in the project description, it was time for the dirty work of developing the scaffolding. Through two small introductory projects (Harry T. Huxley & Paper Automata), we would be able to start building the culture within our class. More importantly though, we would be able to get to know our students on a small stakes project. These individual experiences with each student would let us make better grouping decisions on the upcoming project.
Disclaimer: I won’t for a minute pretend that this was all planned out beforehand. Most of the day-to-day operations, tutorials, and mini-projects were planned out a few days ahead of time (at best).
Integrated with the aforementioned mini-projects (and alongside some more traditional physics instruction), we then started skill building through a smattering of individual and group projects that we developed, including:
Illustrator / Laser Cutter Tutorials (check out here and here). These tutorials, like many aspects of my class, were pass/fail with multiple attempts allowed.
Individual Student Scoping
At this point, students had individually completed a draft of a preliminary social theory in Humanities. Students were asked to dissect their theory into logical states, to describe the cause/affect of each state, and to produce a qualitative timeline of how their theory would progress alongside the overall rise and fall of a civilization. This process was documented in a graphic organizer.
Students were then introduced to the mechanism requirements and exposed to a number of different examples of interesting mechanical technologies, including: Ralph Steiner’s Mechanical Principles (1930), 1800 Mechanical Movements, Automata and Mechanical Toys, and 507 Mechanical Movements. They were then asked to formulate or select a mechanism that could be used to represent their individual theory, which was also documented on a graphic organizer.
Students were critiqued and assessed on the accuracy of their process, how realistic it would be to fabricate, and also on how well their mechanism represented their theory. This was the primary deliverable (grade wise) for this project.
Gear Research
Now that students had some more exposure to various gear systems, students were tasked with figuring out what gears are and how they work. Specifically, they were given a prompt for a group inquiry project where they had to do research on gears and present their findings to the class per this rubric. These presentations were followed by some simple worksheets on gears.
Group Scoping
Now that each student had completed a preliminary theory and design, each group had to develop a cohesive group theory. They were able to completely adopt one members theory, combine individual theories, or come up with a new one. Once they had finished their preliminary abstract for their group theories, they repeated the above scoping and design process. However, the process was much more intensive for the group theory and involved multiple peer and teacher critiques. Timelines for the mechanisms had to be quantitatively precise as they would be the basis for all subsequent calculations and design. From this point on, all student progress on the project was based on it’s compliance with the completed scoping and design documents.
Various examples of this group process are available here.
Prototyping & Calculations
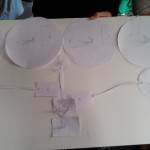
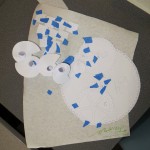
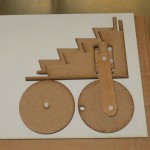
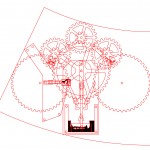
Now that the group mechanism design is set in stone, students began the necessary calculations to ensure that their mechanism achieved the exact timing described in their scoping documents. They also began prototyping their mechanism in paper and cardboard. Once their paper proof of concept seemed legitimate they would proceed into designing in illustrator.
Iterative Design
At this point in the process, class was almost entirely composed of free work time. Students were given daily and weekly group objectives and they worked according to their job description to accomplish each objective. As designs became finalized, they were given better quality materials. Weekly group/teacher meetings were scheduled to keep track of individual and group progress throughout this free work time.
Related Resources:

[…] and I have spent a great deal of time talking about what went right and what went wrong with the Apocalypto Project. We’ve also spent a great deal of time talking with our students who expressed significant […]